

How to migrate data off Planetscale to another freely-hosted MySQL database in 5 minutes


Introduction
Planetscale has sunset its much beloved free tier (hobby plan), as it was announced by its CEO a couple of days back in their blog post.
Over the last 2-3 years, a lot of developers and even early-stage companies have managed to use Planetscale's MySQL database in the hobby plan, essentially paying nothing for it, and now understandably that has come to a screeching halt.
I had to face this since my personal website - https://vikrantbhat.com/guestbook used Planetscale's hobby plan for storing messages received in the guestbook.
After 8th April 2024, every database on the hobby plan will be slept 💤 by planetscale, so if you come under that category, then you have two options:
Upgrade Planetscale's plan which starts from $39 👀
Export all your data and move to another database service (which is ideally cheaper or has a free tier)
So in this article we are going to go through the process of migrating your data from planetscale to another free MySQL database.
1. Export/dump your data from Planetscale
Note: Even if you are not a planetscale user, reading this blog post will teach you how to export and import data to and from a MySQL database.
Exporting your data out of planetscale is actually pretty simple, thanks to the pscale CLI (Make sure to set it up before moving ahead). Just run the following command in your terminal.
> pscale db dump <DATABASE_NAME> <BRANCH_NAME>
Replace <DATABASE_NAME> and <BRANCH_NAME> with the values of your database. 🚧 Make sure you are dumping data from the right branch.
Once the dump is complete you will see a folder is created with a bunch of .sql files in it, and it will look something like this:
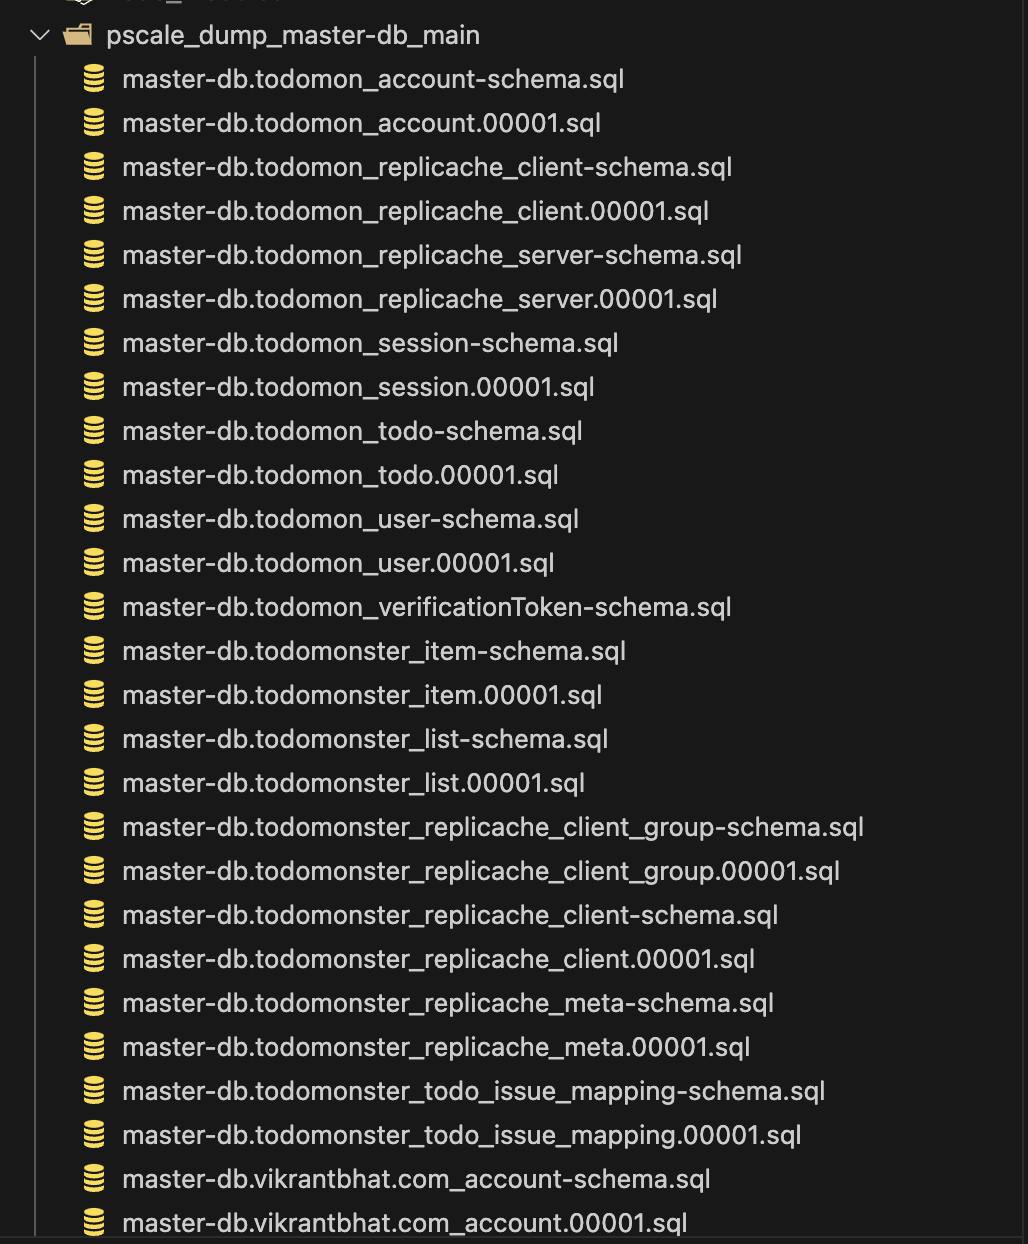
If you look closely, it has two types of .sql files -> *-schema.sqland*-00001.sql .
*-schema.sql files are for creating the database tables while *-00001.sql contains data to be inserted into the tables. (Please note that there can be more files like *-00002.sql, *-00003.sql .... depending on how much data you have in your planetscale database.)
Now that we have the database dump, all we have to do is to run these SQL files against our new MySQL database. But instead of running all of these files one by one manually, it would be easier to join them into a single file and then just run those at once.
Note: the files must be run in order - schema files first, then the data files
So we’re gonna need to do 2 things, first step, concatenate the schema since we want them to run first. Then we will also make another file for the data sql files.
2. Create a single schema file (concatenate all schema files)
run the following terminal command inside the folder where the .sql files are
> cat *-schema.sql > all_schema.sql
3. Create a single data file (concatenate all data files)
> cat *.00001.sql *.00002.sql > all_data.sql
Note: based on what number of data files were generated for you, update the above command.
For eg. if files upto *.00003.sql were generated then your command should be: cat *.00001.sql *.00002.sql *.00003.sql > all_data.sql
Now you must have these two files:

Make sure that there are no double quotes in all_data.sql and all_schema.sql.
Otherwise you will get this error. Just replace any double quotes with single quotes and you should be good.
Now that we have collated all our schema and data into just two SQL files, we are ready to execute them on our new database, but, one last step before that is to provision a new MySQL database.
4. Provisioning a new MySQL database
You can provision a MySQL database for a small monthly fee at:
but I will be using https://aiven.io/, which has a free tier for hosted MySQL databases.
Once you've provisioned a new database, continue reading ahead.
5. Creating the schema
Now, we’re going to create the schema on our new database. It will be done by running this command:
> mysql -h "<RDS_HOST>" -P <PORT> -u <USERNAME> --database <DB_NAME> -p < all_schema.sql
inspect your database and you will see that the tables with their respective schemas have been created.
6. Ingesting the data
Now, we’re going to ingest the data in our new database. It will be done by running this command:
> mysql -h "<RDS_HOST>" -P <PORT> -u <USERNAME> --database <DB_NAME> -p < all_data.sql
inspect the database tables and you will see that the data has been imported.
Note: Make sure that you create the schema before ingesting data.
and viola! Just like that, you have migrated all of your data from Planetscale to another MySQL database, ideally in less than 5 minutes!

Outro
While I was writing the blog post, webdevcody also released a video explaining the same process, so here's the video link if you fancy one.